
Not having had much experience with audio production, recording the Perth Web Standards Group presentations involved a bit of a learning curve.
Based on some excellent advice from the other WSG city groups, we managed to get a pretty good result, so I thought I’d share some of the tips and also things I learnt the hard way. While there are a lot of blog posts and articles online about recording a podcast, most are geared towards creating a recording for release, sitting with a headset in front of your computer, not recording a live presentation where there are lots of external factors to consider. Maxine Sherrin presented to the Sydney Web Standards Group on the topic of podcasting an event, based on her experiences with Web Essentials 05 – and yes, a recording of that presentation is available from the WSG. My method is more the small scale seat-of-your-pants style recording, however, and is more suited to small events like user groups and small lectures.
There’s an important distinction between “podcasting” and “making an MP3 file available”. A podcast (and I’m not really liking that term, but anyway) is an audio enclosure made available through an RSS feed. As the Web Standards Group takes care of the RSS bit, all I’m really concerned with here is getting the audio recorded.
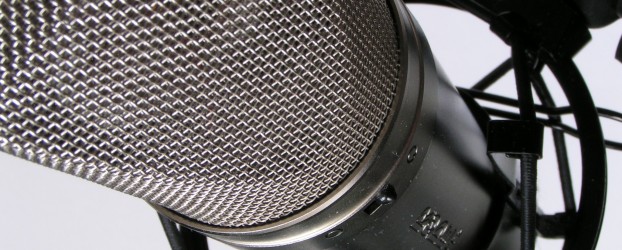
Equipment
To record the presentations, I used a Sony minidisc recorder. I had a unit that I paid an exorbitant amount of money for about 6 years ago when MP3 players were still a major novelty and the iPod still a twinkle in Mr Jobs’ eye. The built-in rechargeable battery on my recorder was long dead, but it had a caddy for a single AA battery and that was still working fine. I was pretty stoked to have found a new use for the poor thing, which had been sitting in its box unused for at least the last four years. Newer versions of the same unit are significantly cheaper – I found one for sale online for AUD $99 brand new. There’s also a new type of media that stores 1GB (the old ones have the same capacity as a standard CD).
I bought a Sony tie/lapel microphone for the princely sum of $30. I don’t know if that’s bottom or top of the range, as it was the only one they had a Dick Smith’s, but it’s a Sony so I figured it must be ok and the results were very good. It didn’t come with a battery of course, so that was another $4 (it took a watch/calculator style battery).
While I was at it I invested in a pack of blank minidiscs as they are magneto-optical media and probably don’t last forever, and mine had been in the box with the unit for a few years. JB Hi-Fi only stocked one type of one brand and only in a 5-pack, so that was another $15. I also made sure I had spare AA batteries just in case.
Setting up and recording
The speaker clipped the mic onto their shirt and put the minidisc unit in a pocket. The minidisc recorder had a ‘lock’ switch so I made sure that was on in case the unit got knocked around in the speaker’s pocket and switched off accidentally. Unfortunately the on-switch on the back of the mic didn’t have that capability, and one of the speakers accidentally turned it off while clipping it on, so that’s something to be careful of. Before sending them on to speak I did a quick record and playback test to make sure the mic wasn’t being obstructed – in this case I used ear buds to check the recording level. Being in a hurry I had one ear plugged in only and couldn’t work out why the first test wasn’t working. Eventually I realised the ear bud I had plugged in wasn’t working properly, and the other ear bud was ok, and the recording was working after all. Minor heart attack averted.
In our case the speakers weren’t using an amplified mic. We held our event in the Edith Cowan University Tavern (we were the only people in there) and it would have been small enough for the speaker to be heard clearly without amplification, except for the very noisy refrigerator behind the bar. While this made it a bit of a challenge to hear the speakers, particularly one who had a quiet voice, fortunately the noise wasn’t carried through to the recording. Next time we’re having the speaking part of the event in a lecture theatre close to the tavern so we won’t have that problem again.
Both our speakers invited questions from the audience both during and after their presentations. On the final podcasts, sometimes you can hear the question clearly and sometime you can’t, depending on how loud the questioner was and how far they were sitting from the speaker. In future, I will make sure the presenter repeats the question for the benefit of the recording – and for the benefit of the rest of the audience, if the question was hard to hear.
Because I’m paranoid, I changed the AA battery in the recorder between speakers and popped in a fresh minidisc just in case disaster occurred and the first recording got overwritten with the second.
Digitising
I downloaded Audacity, an open source audio application, to do my audio editing. Transferring from the minidisc recorder to PC was as simple as plugging in the cable, hitting record in Audacity and play on the minidisc unit.
Based on some advice from other WSG members, I ran a normalise filter (to equalise the volume across the recording), then a high pass (to remove excess hiss) and low pass (to remove excess boom). This made the recording very quiet, so I normalised again. I worked out later that I probably shouldn’t have normalised before I ran the high and low pass filters but the end result sounded ok to me so I didn’t think it was worth starting over.
To render the Audacity project down to MP3 I went with a 32kbps bit rate and 16kHz sample rate, as these settings seem to be the norm for other podcasts that I downloaded. The file sizes seemed pretty reasonable – just under 5MB for the 22 minute presentation and just over 2MB for the 10 minute presentation – so I was happy with that. Finally I added ID3 information – artist (speaker), album title (Web Standards Group), Genre (Other), Title (presentation title), and comments (date and location recorded). Although there’s a thousand ways to edit the ID3 tags on an MP3 file I did it straight from the summary tab of the Windows file property dialog.
In conclusion…
I’m pretty happy with the end result. It was suggested that as they have recording capability it might be easier to record with an iPod, as the file is digital to start with. Seeing as I don’t have an iPod and I do have a minidisc recorder on hand I went with what I had. I’m not sure of the recording quality of the iPod or if the recording is compressed at all to start with – at any rate the minidisc player produces an outstanding quality recording and the process was not difficult so I will probably continue recording WSG presentations this way.
Next task was getting the transcript done… but that’s a post for another day.
2 Comments
Leave a reply →